
How It Works
What activities are tracked?
You decide what can be monitored. StudyTrack captures learning activities like browsing research material, writing code, reading documents, and working in office tools. Social media, email, messaging, and LMS platforms are automatically excluded — only activities that reflect genuine independent study are tracked.
How are credits calculated?
One ECTS credit equals 25 hours (1,500 minutes) of verified learning. StudyTrack aggregates your daily summaries until you reach this threshold, then generates a credit milestone report that recognizes learning for credit when evidence is matched to specific course ILOs.
How do credit exemptions work?
Credits you earn through StudyTrack are applied as exemptions in your degree's second tier of courses. Once you've earned enough exemptions — typically five — you can skip one course in that tier. One credit on its own won't remove a course, but each one counts toward that goal. Check your Woolf dashboard to see your tier and progress.
How is my data used?
Woolf manages millions of records for students. Activity records are captured and stored locally on your device. They are uploaded securely for AI analysis, which deletes irrelevant content and produces your daily summaries and credit milestone reports. Your data is used solely for learning verification — it is never shared with third parties or used for advertising.
Why does StudyTrack need Accessibility and Screen Recording permissions?
Accessibility lets StudyTrack read the title and URL of your active window so it can identify what you're studying. Screen Recording lets it capture periodic screenshots of your active display as evidence of learning activity. Both are required for learning verification.
StudyTrack only reads context from whitelisted study apps — it cannot see content in excluded apps like messaging or email. You can revoke either permission at any time in System Settings (macOS) or system privacy settings (Windows).
What data does StudyTrack capture?
StudyTrack primarily tracks which apps you're using and how long you spend in them. This gives it a picture of your study activity without capturing the content of what you're doing.
StudyTrack also periodically captures a screenshot of your active display while you're using a supported study app — you control this. These images are stored locally on your device and uploaded securely for AI analysis as part of your learning verification. The images are deleted except for a key image representing your most valuable activity — you can see this key image in your daily report.
Does the app need to be open for tracking to work?
StudyTrack runs quietly in your system tray (macOS menu bar or Windows taskbar) and is set to launch automatically when you log in. You don't need to open the main window for tracking to work — it runs in the background whenever your computer is on.
You can click the tray icon at any time to open the dashboard, check your progress, or pause tracking.
Can I pause or stop tracking?
Yes. You can pause tracking at any time from within the app. While paused, no activity is recorded, no screenshots are captured, and no data is uploaded. You can resume whenever you're ready. Pausing does not affect any credits you've already earned.
Installing StudyTrack on a Mac
You will need macOS 15 (Sequoia) or later. Setting up takes about five minutes. Sign in with the same email address Woolf uses for your studies — the app checks your enrolment against it.
Download the app from https://sdk.woolf.university/app/StudyTrack.dmg.
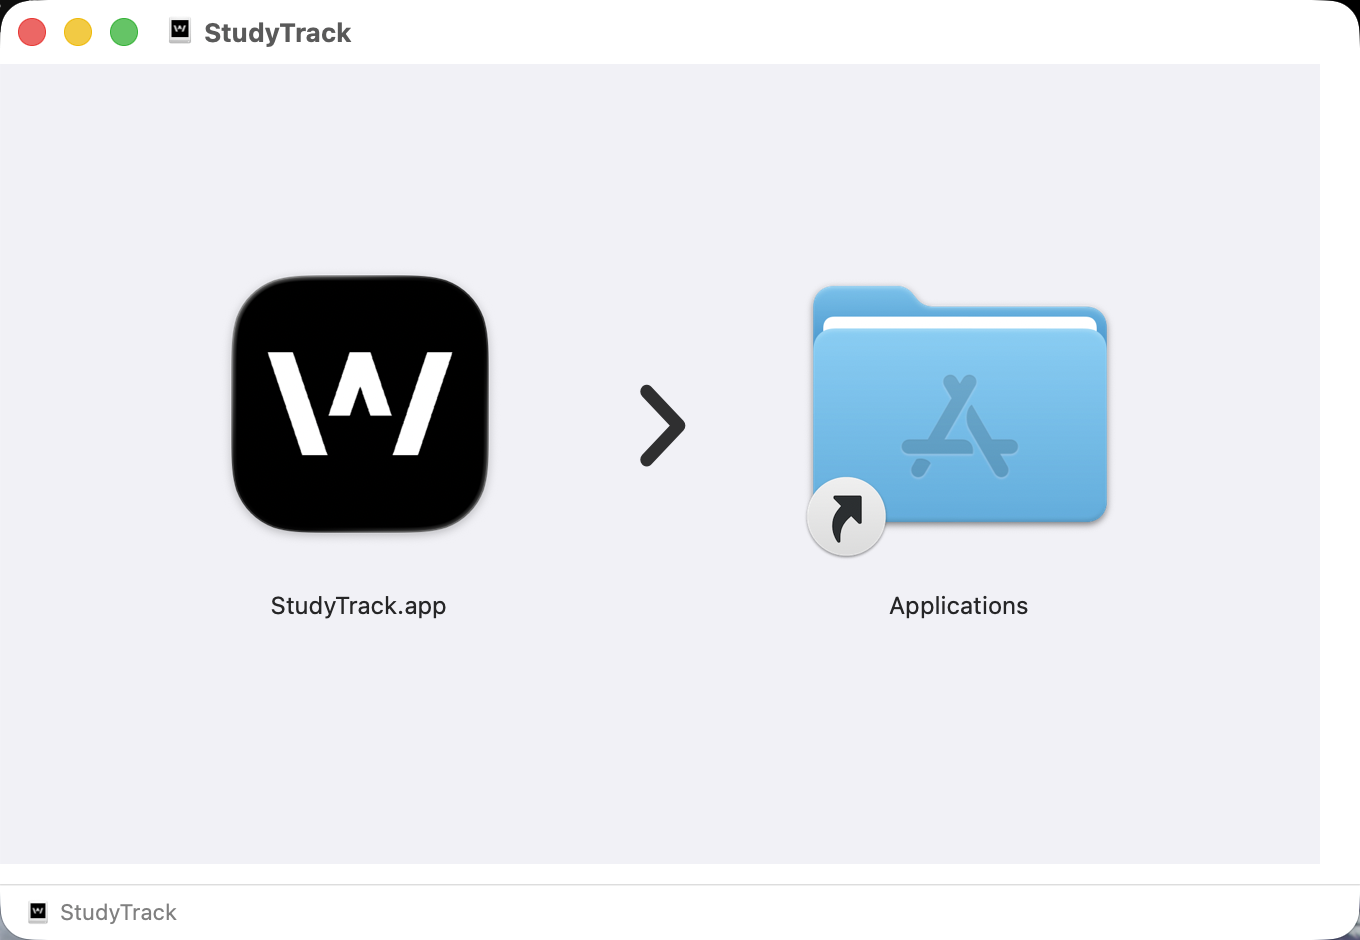
Open the downloaded file and drag the StudyTrack icon onto the Applications folder shown beside it.
Open StudyTrack from your Applications folder. The first time, macOS asks you to confirm you want to open an app downloaded from the internet — click Open. StudyTrack is signed and notarised by Apple under Woolf Inc., so you should not see a warning that it cannot be opened.
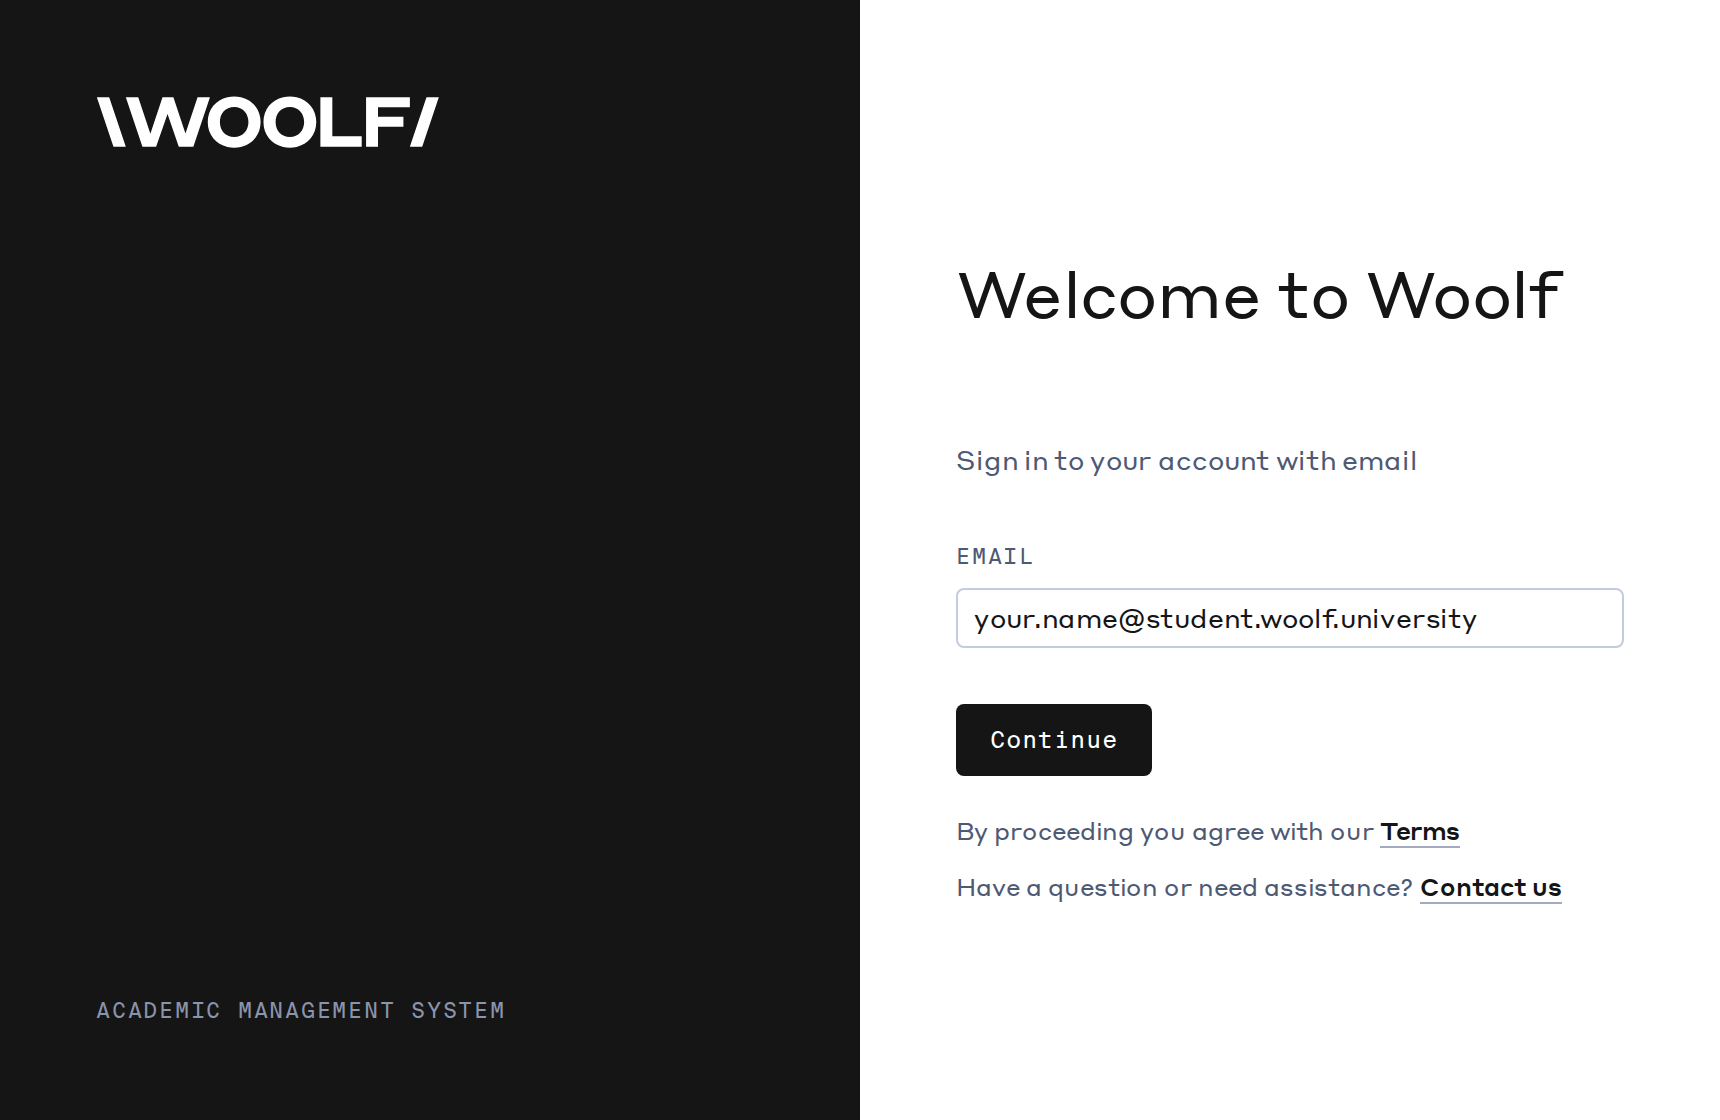
Sign in. Enter your Woolf email address and click Continue. We send you a code — type it in on the next screen and you are through.
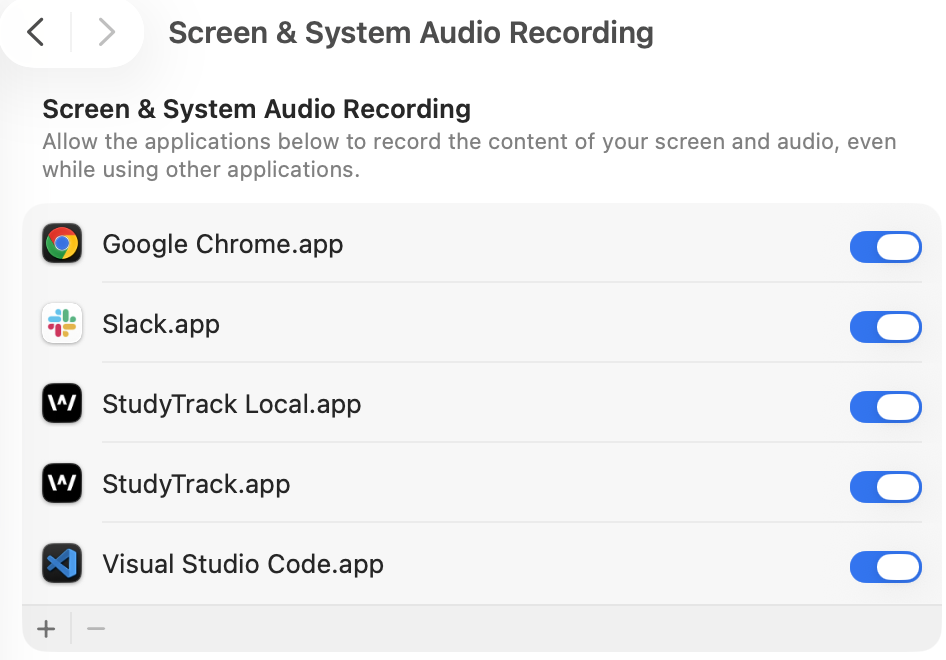
Grant two permissions. The app walks you through both, and macOS opens System Settings each time — switch StudyTrack on and come back. Accessibility lets StudyTrack see which app and which web page is in front, so it knows what you are working on. Screen Recording lets it take the periodic screenshots that evidence your work.
Screen Recording needs a restart. macOS only applies Screen Recording after the app is reopened. Quit StudyTrack completely and open it again, or it will look switched on but capture nothing.
StudyTrack.app switched on under Screen & System Audio Recording. Your own list will show different apps.
That is it. StudyTrack now runs in the background. You will see its icon in the menu bar at the top right of your screen — click it to pause or quit.

Installing StudyTrack on Windows
You will need Windows 10 or later. Setting up takes about five minutes, and Windows does not ask for any permissions afterwards.
Download the installer from https://sdk.woolf.university/app/StudyTrack.exe.
Run it. You will probably see a blue warning box saying “Windows protected your PC”. Click More info, then Run anyway.
Windows shows this for any newly released app until enough people have installed it. StudyTrack is signed by Woolf Inc. — you will see that name once you click More info, and again on the next prompt. If it says Unknown publisher instead, stop and email us.
Click More info, check the publisher reads Woolf Inc., then click Run anyway.
Approve the install. Windows asks permission to make changes — the publisher shows as Woolf Inc. Click Yes, then follow the installer. If this says Unknown publisher, close it and email us.
Open StudyTrack from the Start menu or the new desktop shortcut.
Sign in. Enter your Woolf email address and click Continue. We send you a code — type it in and you are through.
That is it. StudyTrack now runs in the background.
Finding the app once it is running. StudyTrack lives in the system tray, at the bottom right of your screen near the clock. Windows usually hides new icons, so click the small
^arrow to show them. Right-click the StudyTrack icon there to pause or quit. To keep it visible, drag the icon out of the hidden area and onto the taskbar.Windows hides new icons. Click the
^arrow near the clock, and StudyTrack is in the panel that opens.
How do I know it is working?
Three things tell you, in the order they happen:
The icon is there — menu bar on a Mac, system tray on Windows. If you can see it, StudyTrack is running.
The app shows your degree when you open it. If it says you are not enrolled, see below.
A daily summary appears. Summaries are written overnight, so the first one shows up the day after you start. Nothing appearing on day one is normal.
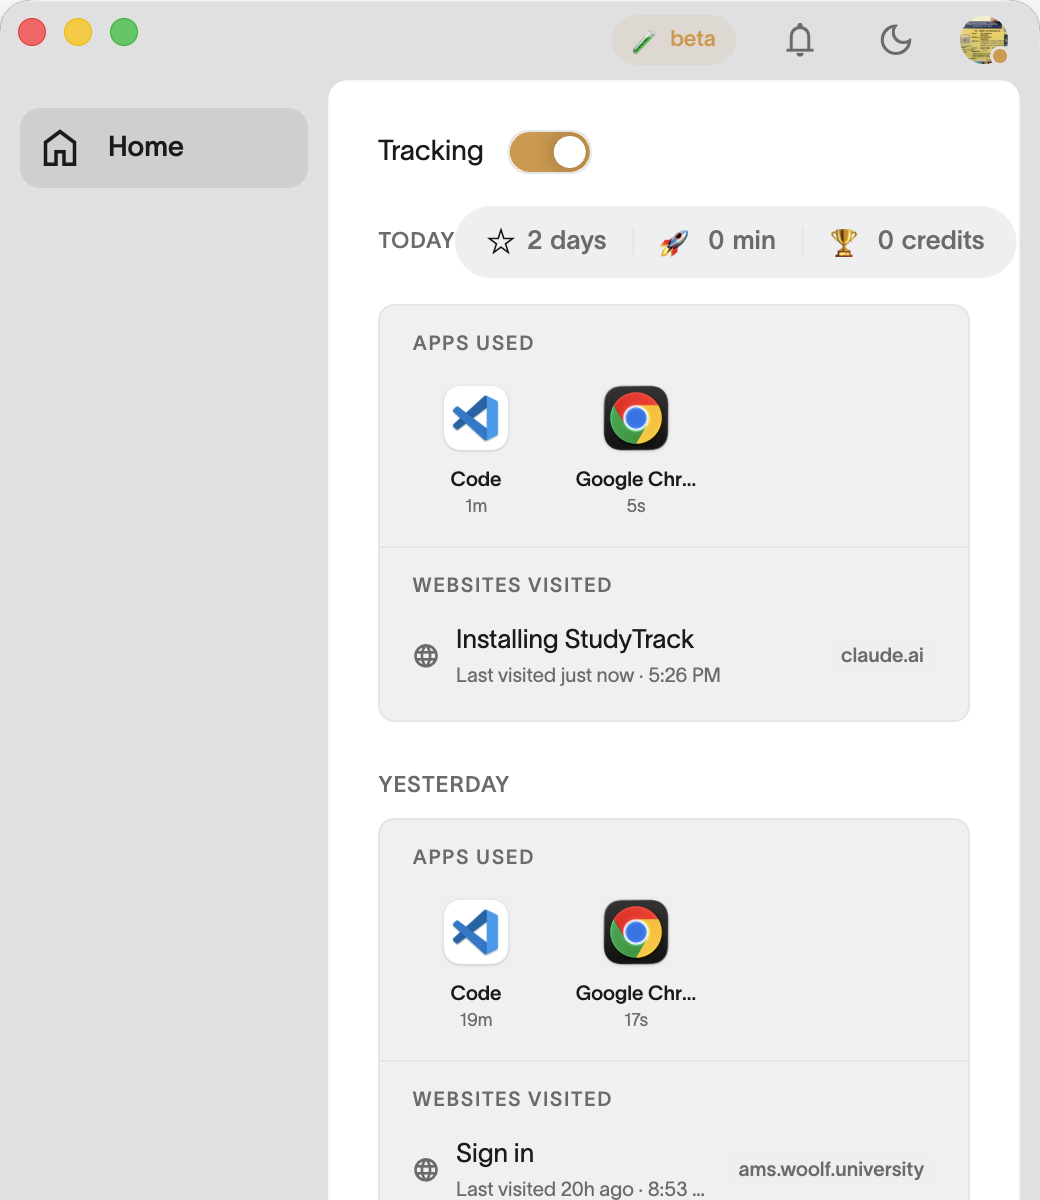
StudyTrack running normally: tracking on, and the apps and pages it has recognised so far.
If something goes wrong
It says I am not enrolled, or nothing happens after I sign in. StudyTrack only opens for students whose enrolment is fully active on a supported degree. If you have just been invited, some steps may still be outstanding. Reply to the invitation email and we will check your account.
I signed in with the wrong email. Use the address Woolf has on file for your degree. A personal address that is not on your student record will not find your enrolment.
Mac: it is running but nothing is being captured. Almost always Screen Recording. Open System Settings → Privacy & Security → Screen Recording, check StudyTrack is on, then quit the app completely and open it again — macOS does not apply the change until you do.
Mac: macOS will not let me open the app. Right-click the StudyTrack icon in Applications and choose Open, then confirm. That only needs doing once.
Windows: I cannot find the app after installing it. It is running in the system tray, not as a window. Click the
^arrow near the clock to show hidden icons.Windows: it will not start, or closes immediately. Restart your computer and try again. If it still fails, email us with what you see — include your Windows version.
I want to stop it for a while. Pause it from the menu bar or tray icon at any time. Credit you have already earned is unaffected, and you can resume whenever you like.
StudyTrack captures your work only where it is relevant to your degree. Social media, email, messaging and your LMS are never captured, and you can pause at any time. Still stuck? Reply to your invitation email and a person will answer.